Fun folds can be fun and interactive. The Bending Card is fun and the recipient can display their card if they like.
I was introduced to the Bending Card by Donna, a Stampin’ Up Demonstrator from Australia. Thanks Donna
 !
!
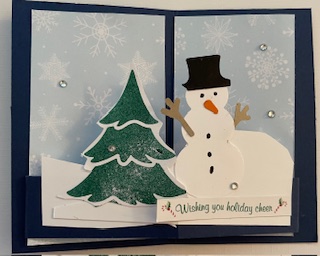
This is the front of the card. To discover how to make this card read below.
What is needed to make this card:
- A piece of cardstock that coordinates with the DSP that you want to use. (I used Old Olive) That piece of cardstock measures 5-1/2″x4-1/4″. This piece of cardstock is your card base.
- With the 5-1/2″ side facing upward score at 2-3/4″.
- A strip of cardstock (I used Very Vanilla) that measures 5-1/5″x3/4″.
- With the 5-1/2″ side of the strip facing upward score at 1/4″ and at 5-1/4″. This will become the strip that holds the ephemera you decorate with and the mechanism that creates the bending part of the card.
- You need 2 pieces of DSP that measure 2-1/4″x4″. These will be the panels for the front of the card.
- You will need a layer for each side of the back of the card that measures 2-1/4″x4″.This is the area you can add sentiments or personal messges. You could also add another layer if you like. If so then cut those layers 1/4″ smaller than the first Layer.
- Gather together the images (ephemera) that you want to decorate with.
- You will need adhesive of course.
- I also always have my bone folder ready to help crisp up the fold lones.
- a trimmer.
- a scoreboard if your trimmer doesn’t score
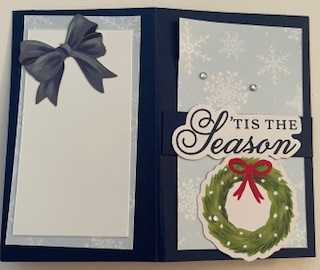
This is the back of the card
To asemble the card:
- Begin with the 5-1/2″x3/4″ strip. Crisp the folds. You should then have a 4″x3/4″ tab on each end to the strip. Place adhesive on each tab (the part that is folded).
- With the front of the card facing you and laying flat, adhere the left tab to left side of the card. Leave a 1/4″ margin from the left side edge of the card. Also the tab should be adhered about a 4″ to 3/4″ from the bottom of the card.
- Rpeat same procedure on the right side of the card with the right tab..
- Adhere one of the 2-1/4″x4″.pieces of DSP on the left side of the front of the card. Also adhere that piece of DSP behind the strip you have already adhered. This DSP will decorate and cover up where the tab was adhered.
- Repeat this procedure on the right side of the front of the carf.
- The card over to see the back side of the card. If you want to stamp a sentiment do so now. You could stamp one panel with a entiment and write a message on the other or stamp a sentiment on both panels. Decorate as you desire.
- Now turn the card back to the front side. Now you can add any image(s) you wish. You can also stamp a sentiment.
- When finished flatten your card gentley and place in a medium envelope.
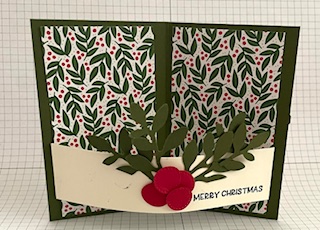
Here is another card made