
I like to take my cards to the next level and personalize them by using the Pocket Thoughts Dies. This set of dies allows me to add fun pockets in different sizes to my paper crafts that can hold gift cards, money, tea bags and anything else I like! Then when I use the stamp imagery and different greetings my pocket projects are perfect for any occasion!
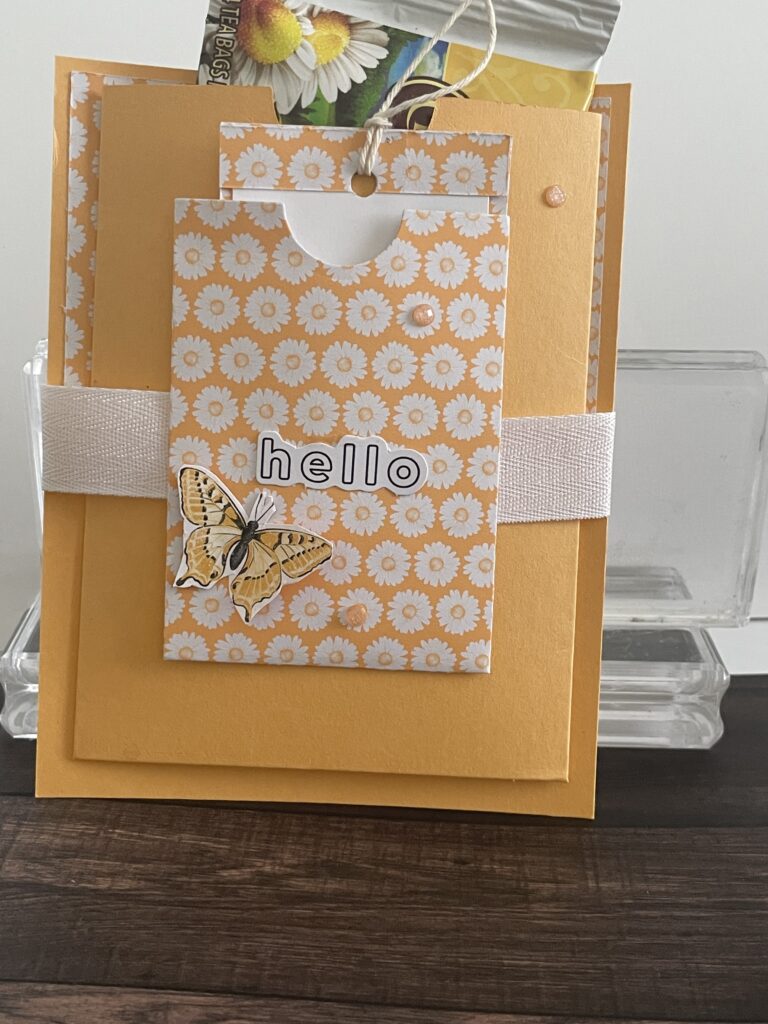
I am planing to send this card to my sister in-law. She likes herbal tea so I put some teabags in the big pocket and a cheery note in the smaller pocket.
Stampin’ Up Supplies
- A 4-¼” x 5-½” piece of Peach Pie card stock 163799
- A 4-¾” x 5-¼” piece of Peach Pie card stock. 163799 Use the largest die and cut out a pocket.
- A 3-¼” x 4” piece of DSP. (I used some DSP from the Wildflower Designers Series Paper 164591 ) Use the second largest die to cut out a pocket.
- A 4” x 5-¼” piece of Basic White card stock (159229) that will be adhered to the back of the card. This is for a message if desired and covers up the ribbon that has been used.
- 2-¼” x 2” Basic White card stock (159229) for the tag that is inserted in the smaller pocket.
- 7” of ribbon 164634
- 6” twine 155475
- Tear & Tape 154031
- Multi Purpose liquid glue 110755
- Cut & Emboss Machine 149653
- Snips 103579
- Pocket Thoughts Dies 163553
- A bone folder 102300
- A medium white envelope 159236
Instructions
- Place the largest pocket die on the 4-¾” x 5-¼” piece of Peach Pie card stock. Run it through your Cut and emboss machine. The die will cut the pocket and also will score the sides of the pocket.
- With your bone folder crisp up the fold lines.
- Add tear & tape to the folded parts and adhere to the 4-¼” x 5-½” piece of Peach Pie card stock. Adhere being mindful of a margin all around the pocket.
- Wrap the ribbon around the pocket and the card base. Secure on the back of the card base. The ribbon is optional.
- With the one size smaller pocket die, place it on the 3-¼” x 4 of DSP and run it through the cut & emboss machine.Add tear & tape and adhere on the larger pocket.
- The 2-¼” x 2” Basic White card stock is your tag that lives in the smaller pocket. You can add your desired image onto the front of the tag. At the top of the tag punch a hole and loop the twine through.
- Trim the twine to desired length.
- Now adhere the 4” x 5-¼” piece of Basic White card stock to the back of the card. This can be used for a message and will cover up the ends of the ribbon if you use ribbon.
- You can fill the larger pocket with a candy bar or what you wish. I put a package of herbal tea in mine.
- You can place it in a medium envelope, address and attach your postage. I am certain you will need more than one stamp if you mail your card.
